Jun 22, 2018 | Gallery, Hand-Crafted Cards |
Boy, am I having fun with the Chase Your Dreams feathers! I had this idea to cut them from Vellum cardstock, and here they are:

Chase Your Dreams Feathers
After die cutting five of them, I chose five different Stampin’ Blends for coloring: Light and Dark Old Olive, Light and Dark Bermuda Bay, and Dark Pool Party. Can’t you imagine the beautiful bird that belonged to these feathers?

Deciding how to arrange the feathers was fairly simple, because I’m using this week’s CAS(E) this sketch.

I decided to hang my feathers from a strip of Graceful Glass vellum, 4″ X 1/2″. It is backed with Whisper White cardstock for a bit of dimension. My feathers have lots of dimension, because they are flying free, solely attached with Glitter Enamel Dots.

Surprisingly, they seem secure. All I needed to complete this “Clean and Simple card was a sentiment. I found, “Hello, let’s talk soon,” in the Better Together stamp set.

This was such a fun project! Thank you, CAS(E) this sketch team, for the CAS (clean and simple) layout.

Product List
Jun 20, 2018 | Gallery, Hand-Crafted Cards |
Why do I do what I do? Because I LOVE it! When I was a child, I spent hours creating with paper, scissors and glue. Then, life interfered with things deemed necessary, and less and less time was spent with creativity. I’ve experience creative spurts throughout my life, like a high school art class, Interior Design classes in college, and decorating my home. My latest “creative growth period” began 2 1/2 years ago when I joined Stampin’ Up! I think the reason it has been long-lasting is the “sharing” factor. Loving it, living it, and sharing it, go hand in hand.
The Crafting Forever stamp set personifies the heart of Stampin’ Up!

Crafting Forever: Love It. Live It. Share It.
I highly recommend doing something creative every day. It’s good for the soul! You probably agree, or you wouldn’t be reading this.
My inspiration for today’s card is from this week’s Global Design Project.

The pot of brushes and pens from the Crafting Forever stamp set would be my focal point. Using the Stamparatus, I stamped it in Versamark on the center of Whisper White cardstock. Next, I inked a Bokeh Dots stamp in Crumb Cake and stamped on top of the Versamark image. After that, I sprinkled the pot of brushes and pens with Gold Powder, and used the Heat Tool to set the Gold.

The sentiment in the Crafting Forever stamp set, “Do something creative every day,” was a perfect reminder of today’s theme. I may have to give this card to myself! My Heat Tool was ready to go, so I stamped the sentiment in Versamark, stamped on Crumb Cake cardstock, applied White Powder, and shot it with some heat. After a few seconds for cooling, I hand cut the sentiment with Paper Snips Scissors.

I chose a Crumb Cake card base with a matt of our new Granny Apple Green. It’s similar to Lemon Lime Twist, but has more green, and less yellow.
For a bit more gold, I wound Gold Metallic Thread around the left side. And, are you wondering where I found those itty bitty stars? Pictured next to the Paper Snips is the die from Candles & Confetti, which I used to get the cut-out stars from a sheet of Gold Foil.

Just so you know, my heart is filled with appreciation for each and every one of you. Without you, my sharing would be impossible. Thank you, thank you, thank you!
All of the supplies for today’s project are listed below, and available in my store.
Product List
Jun 19, 2018 | Gallery, Hand-Crafted Cards |
I was excited to learn the theme challenge at Paper Players this week was “birds.” Yay! Birds add so much life to cards. The project also needed to be “clean & simple,” which meant, lots of empty space and minimal embellishments.

Having been asked if I have tried using different ink colors on our new Bokeh Dots stamp, the answer was now, “yes.” The “ink to stamp” technique worked well by coloring the red rubber with Stampin’ Write markers, then stamping on Whisper White cardstock.
My next experiment was to see how this stamped Bokeh Dots image would look as a bird, cut with a Birds & Blooms die. Would you like to see a Bokeh Dots bird? Here she is:

Bokeh Dot Best Bird
The marker colors I used are: Gorgeous Grape, Highland Heather, Berry Burst and Blackberry Bliss.

The new Thank You die was used to cut beautiful, Thick Whisper White words. I glued this to a Whisper White matt, which was given a linen-like texture by the Subtle Dynamics embossing folder.

The letter “a” provided a perch for my Bokeh Dots bird. She is singing with happiness!
I liked the photography background paper so much (Nature’s Poem DSP) that I decided to decorate the envelope flap with it.

I hope this has given you some ideas on how to use the Bokeh Dots stamps. The possibilities are endless! Scroll on down to purchase at my store.
Product List
Jun 18, 2018 | Gallery, Hand-Crafted Cards |
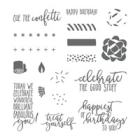
How is everyone today? Are you in the mood for a party? I’ve been wanting to use the sentiment, “Cue the Confetti,” from the Picture Perfect Birthday stamp set, and this is the perfect opportunity. It goes so well with the new birthday bundle, Blow Out the Candles. Never let it be said that I receive new products that are unused. I can’t get them into action fast enough!

Cue the confetti
I love the confetti die from the Candles and Confetti die set, which fits just right on the 4″X 5 1/4″ Whisper White cardstock layer. I thought about adding a different color for the cut-out holes, but decided to let the Bermuda Bay card base show through.
Aren’t the floating balloons pretty? The shades of blue and green remind me of Lake Tahoe, especially Emerald Bay. To achieve the effect, I colored Vellum cardstock with Stampin’ Write markers, in swatches just large enough to accommodate the balloon die.
TIP: I die cut the balloons with the colored side down, so they would have a softer look.
Five of the balloons are attached with Glue Dots, and two with Mini-Dimensionals. The glue shows a bit with close inspection, but I think it’s worth it for the balloons to be translucent.

The inside of the card has “Happy Birthday” from the Blow Out the Candles stamp set, as well as a balloon on a string. I used Lemon Lime Twist for the balloon, and Shaded Spruce for “Happy Birthday.”

The inspiration for my layout is from this week’s CAS(E) this sketch. See how my balloons and confetti conform to the sketch, upside down?

With this striped envelope flap, my birthday card is ready to send.

Thanks for partying with me! Keep on scrolling to shop at my store.
Product List
Jun 17, 2018 | Gallery, Hand-Crafted Cards |
The inspiration for this project begins with two things: the sketch challenge at Fab Friday, and my new stash of Stampin’ Up! product delivered by UPS.
Here is the sketch:
Searching for a circle in my newly delivered stash, I find a good one in the Chase Your Dreams die set. This will represent the doily. The set also has feathers, which I can hang from it. I’ve missed out on feathers from previous years, so this is one of my reasons for purchasing this bundle. Another reason is the word, “dream,” because I’m a lover of paper words!

Chase Your Dreams
Tranquil Textures Designer Series Paper has the perfect color palette for the subject of dreams: Mint Macaron, Tranquil Tide and Balmy Blue. A Thick Whisper White card base will keep the look soft and dreamy.

The background for my card is staring me in the face; the new Bokeh Dots stamp set. I’m anxious to ink it up in Mint Macaron, and delightfully surprised by the results. When first seeing this stamp set in the catalog, I assumed it would cover an entire card front. Wrong! It’s the size of an ink pad.
TIP: The Stamparatus is used to center it, and make sure it stamps evenly.

The circle and feathers are die cut from Tranquil Textures DSP, and “dream” is die cut from Thick Whisper White. “Dream” has two layers for thickness.
The feathers are popped up on Mini-Dimensionals, and “tied together” with a Glitter Enamel Dot.

I hope you’re enjoying the new products as much as I am. You can scroll down to see what I used in this project. Clicking on the pictures takes you to my store for easy shopping.
Thanks for visiting!
Product List
Jun 15, 2018 | Gallery, Hand-Crafted Cards |
Today I’m going to share with you a “quick and easy” thank you card. Believe it, or not, it requires few supplies, and no ink.

Wood Textures Thank You
Beginning with the new Thank You die, I make it into wood by using the Wood Textures Designer Series Paper. It’s made to look, and feel, like real wood by layering it three times with cardstock.
TIP: I make use of the retired Chocolate Chip color cardstock for layering.

Sticking with the woodsy theme, I select the log print from the same Wood Textures DSP pack. Using my Paper Snips, I cut a section of logs to slant like the sketch at Global Design Project. And, the largest, round log is my circle in the sketch.

I decide on a Crumb Cake card base, layered with Basic Black cardstock, and layered with patterned, Crumb Cake, Tranquil Textures Designer Series Paper. See how I’m letting the DSP do the work? I glue it all together, and my masculine, thank you card is complete.

Scroll down to see the short supply list. I was impressed by the small mess I made!
Thank you Global Design Project Team for the inspiration.
Product List