I’m beginning this Monday, the second day of July, with a technique using gorgeous Designer Series Paper named Share What You Love. Can you see the six different patterns I used to create this card?
Celebrate Amazing You
After looking through the twelve patterns that come in the pack, I found five scraps from previous projects, and lined them up in a pleasing (to me) manner. Using the Stampin’ Trimmer to cut 3/4″ X 4″ strips, I glued them to Whisper White cardstock.
The three words I chose are from the Celebrate You die set. And, “celebration” happens to be the theme for the 400th challenge at Paper Players. That’s a huge amount of inspiration passing through their site! Congratulations to the team, and all of the participants!
For this 400th challenge, my idea needed a frame. I used a retired Project Life die to cut the frame from Soft Seafoam cardstock. Before gluing the three words to the center section, I embossed it with the Subtle embossing folder for some texture. I really like how the loop of the “g” is over the “ate.” I can’t take credit for that, because it happened naturally when fitting the words in their space.
The outside section of the Sea Foam frame was covered with the sixth pattern from Share What You Love Designer Series Paper. This double layering made the frame sturdy for placing on Adhesive Strips, adding dimension. The card base is Soft Sea Foam (matching the center section), which is becoming one of my favorite, new colors.
The final touch was the “pearlized” flower I hand cut from one of the patterns, and added it to the frame. When the light catches it right, it shines brilliantly.
Other than the frame, the products I used in today’s project are listed below. Thanks for checking out my paper words. I hope it was inspiring!
All I have to do is dream, and this card just makes itself. I love it when that happens! It was “quick & easy” with minimal supplies, which you’ll find at the bottom of this post.
Chase Your Dreams
Not to deviate from the subject, but I have to tell you, I was singing “dream, dream, dream,” while making this card. Do you remember the Everly Brothers’ song, “All I Have To Do Is Dream?” It was recorded in 1958. Thanks to U-Tube, here they are singing their hit song, and you too can sing along.
Back to card making. I began by looking through my new Stampin’ Up sets for a circle. Suddenly, the detailed circle in the Chase Your Dreams die set jumped out at me. So, I cut three of these beautiful circles down the middle of Thick Whisper White cardstock.
Next, a selection of Wood Textures Designer Series Paper (the lightest one) was adhered to the back, so it’s peeking through the cut-outs in the circles. Then, I adhered this to a Thick Whisper White card base.
Are you wondering how I got the idea of three, dreamy, circles? Check out this week’s CAS(E) this sketch.
The word “dream” is another die in the Chase Your Dreams die set. Wanting it to blend, and be dream-like, I used the same Wood Textures DSP. The word has three layers of cardstock for thickness, giving dimension. And, that’s it for the card.
I decorated the envelope flap with the Simple Stripes embossing folder, so it’s ready to send.
Thanks for stopping by, and allowing me to reminisce a bit. Now, get your supplies to make this easy, dreamy card!
Enjoy life, and celebrate with balloons! Balloons personify birthdays, right? I think the balloon in the Stampin’ Up! Blow Out the Candles Bundle is extraordinary, and I’ll tell you why. It’s the perfect size for our 5 1/2″ X 4 1/4″ cards, it has a skinny string attached to it, AND it has a die for cutting. Plus, there is a die for cutting a balloon that fits right on top of it. What more could you ask of a balloon!
Our silhouetted girl from the Enjoy Life stamp set is all in.
Enjoy Life with Balloons
I first stamped the balloons in Smoky Slate ink, and cut them out by hand. Kidding! You know I used the die, just wanted to see if you were paying attention.
The balloons are topped with scraps from Tranquil Textures Designer Series Paper, also cut with a die.
I’m having too much fun with the Bokeh Dots stamps, and chose this for the girl’s background. I stamped the Bokeh Dots in Mint Macaron, and the girl in Call Me Clover ink. Guess what the girl’s name is…….you’re right, Clover.
Next, I stamped some Mint Macaron grass for Clover to stand in, and used the Stampin’ Trimmer to cut this rectangle from its Whisper White cardstock. Using a new piece of Whisper White cardstock, I embossed it with the Oh My Stars embossing folder, to coordinate with the stars in the Bokeh Dots stamp.
Clover was so excited about this birthday celebration, she wanted to share it at a site she discovered when searching the internet, called Seize the Birthday.
Before sharing, I needed to complete the project. I continued with the sky theme of stars, and chose the color of Balmy Blue for the card base. Additionally, I got the idea to round all of the corners with the Detailed Trio Punch. This punch makes it so easy, I’ll be doing more of this. Someone may have to tell me to stop.
For a sentiment, Clover wanted to say “Enjoy your special day!” which is from the Dragonfly Dreams stamp set. A Petals & More die provided the perfect shape for the sentiment.
On the inside is “Happy Birthday” from the Blow Out the Candles stamp set. Both sentiments are stamped in Call Me Clover ink. The envelope flap is decorated with Balmy Blue from Tranquil Textures DSP.
Clover and I thank you for stopping by. If you’d like to add these fabulous balloons to your collection, or you’d like your own silhouette girl, you’ll find them at my store. Enjoy life!
Birthday cake is the center of attraction on this birthday card. It’s from the Stampin’ Up! bundle, Blow Out the Candles. “Bundle” means the stamps come with dies for cutting, which is a real time saver in my crafting world.
Blow Out the Candles Birthday Cake
I was in the mood for chocolate cake, so I made the cake with Crumb Cake ink and frosted it with Soft Suede ink. The outline and candles are Lemon Lime twist ink. I used the Stamparatus for perfect placement of these “two-step” stamps. I could have stamped the Crumb Cake ink a second time, but don’t you like this mottled look for cake?
Layering Circles dies were used to surround the cake. The circle the cake is resting on was stamped in Pool Party ink with a Swirly Frames stamp.
This circle idea was inspired by the challenge at Paper Players. You can see, I used the rectangles in the layout as well.
The pretty, dotted paper is from the Share What You Love Designer Series Paper. The Whisper White rectangle is embossed with the Subtle embossing folder. Everything is layered on Pool Party cardstock, for a nice border.
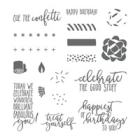
“Eat cake and enjoy your day ” is from the Blow Out the Candles stamp set. It was stamped in Basic Black ink and hand cut, before gluing the words vertically.
“Happy Birthday” on the inside is also from the Blow Out the Candles stamp set. I stamped it in Pool Party ink, and found a piece of coordinating designer Series Paper to decorate the envelope flap.
Thank you Paper Players team for the inspiration with your classic card design. Now, let’s go eat some cake!
What’s a birthday without the Happy Birthday song!? We all know the song, and it has just four little words. I figured I could find the words among my growing collection of stamps, and I did. “Happy Birthday” is from the Picture Perfect Birthday stamp set, and “to you” is from Tabs for Everything.
Singing Happy Birthday To You
Thanks to the Stamparatus, I was able to stamp the Happy Birthday song in Soft Suede ink, without much of a problem.
TIP: The words should be the same type (rubber or photopolymer) so their height is the same when using the Stamparatus. I used photopolymer.
The words fit within a Whisper White rectangular piece of cardstock that would become the top layer in today’s card. Can you see how I’m using Charlet’s layout from the Global Design Project?
To emphasize “singing,” I used the Sheet Music background stamp to stamp the music in Sahara Sand ink on Whisper White cardstock. This rectangle is the full length of the 5 1/2″ Crumb Cake card front, and 2″ wide. Continuing to mimic Charlet’s layout, I cut a 2″ wide piece of leaf print from Nature’s Poem Designer Series Paper. After determining the right length, I finished the bottom using the Banner Triple Punch. Sometimes I make this banner shape by hand, but I like the way the punch gives an exact cut.
Instead of a definite circle, I used leaves from the Rooted in Nature stamp set. I stamped the leaves in Tranquil Tide ink on Vellum cardstock, and cut them with a Nature’s Roots die. I added a frame of Tranquil Tide cardstock to the words, and taped the leaves beneath this layer. Dimensionals were used for adhering, so the leaves are lifted a bit.
It’s such a pretty leaf, I decided it would be good for decorating the envelope flap. I used Crumb Cake ink, and stamped randomly.
And, one more vellum leaf on the inside.
I think I’m going to be singing “Happy Birthday” all day! If it’s your birthday, enjoy!
Stampin’ Up’s Animal Outing stamp set is the cutest! The baby rhinoceros has been stamped and colored many times in shades of gray, but this rhino wanted to show off the new “in color” Blueberry Bushel.
Blueberry Bushel Rhino from Animal Outing
Can you see the shading on Baby Rhino? This was done with the Bokeh Dots stamp. I inked the Bokeh Dots stamp in Blueberry Bushel, stamped on Thick Whisper White cardstock, and used the rhino die for cutting. I don’t mind fussy cutting sometimes, but this die cuts between the horn and the bird perfectly. So glad I didn’t have to cut that by hand!
The Animal Friends die set also has a die for cutting those colorful, vertical plants. I positioned the die on Whisper White cardstock, as you see, running it through the Big Shot three times. Then, I used the Stampin’ Trimmer to cut three strips of colorful paper, 1/2″ X 3 1/4″. The strips were taped to the back before adhering the art piece to a Thick Whisper White card base.
My inspiration for the color palette is from the Fab Friday challenge. Why not use the five, new “in colors” on the same card?
I used Blueberry Bushel ink for Baby Rhino, and Lovely Lipstick, Call Me Clover, and Pineapple Punch cardstock for the plants. The 5th new color, Grapefruit Grove, was introduced with the sentiment from the Animal Outing stamp set. I stamped “Thank you, big time,” and used a Layering Oval die for cutting.
I placed Baby Rhino and the sentiment on dimensionals, and my bright , cheery thank you card was complete.
Scroll on down to see all of the supplies I used for this project. Thanks for stopping by!
My name is Su Mohr, Independent Stampin' Up! Demonstrator. I am responsible for the content on this site. Stampin' Up! does not endorse the use of or contents of the classes, services, or non-Stampin' Up! products I may offer here.