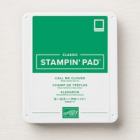
“Out with the old, and in with the new.” It’s that time of year when Stampin’ Up reveals its new 2019-2020 Annual Catalog. But, we have become fond of our five, In Colors from 2017-2019, haven’t we? Today’s card is in honor of Powder Pink, Lemon Lime Twist, and Berry Burst.
If you love the colors, stock up now, before they are no longer available. Just click on the photos in my Product List to go to my store for purchasing.
Retiring Colors
I’ve used the sketch from CAS(E) this sketch for my clean and simple birthday card.
The card base is Thick Whisper White with a section of diagonal black lines from Botanical Butterfly Designer Series Paper. The square is also Thick Whisper White, cut with a Stitched Shapes die, and elevated with Foam Adhesive Strips. These strips are twice the thickness of regular dimensionals, which I like to use for extra height.
The flowers and leaves were made with well loved, Eclectic Layers dies, which may also be retiring. We will know in a few days! You can see the In Colors: Powder Pink, Lemon Lime Twist, and Berry Burst.
The dotted, flower centers, are from the 6X6 Designer Series Paper. The Itty Bitty Greetings stamp set provided “Happy Birthday, which I cut with a Bunch of Banners die.
I’m waiting with you in anticipation of all of the”new” to be revealed! Have an enjoyable day!
Welcome to the Pals’ April Blog Hop. We’re so glad you’re here because we love to put our ”Families First”! Our Design Team created beautiful projects to inspire you. You may be starting the hop here or coming from a previous Pal’s blog. Either way, you’ve come to the right place. You’ll find the full line-up below to help you move, or “hop” along from Pal to Pal.
52 Second video
I’m back, and I will be giving you step-by step, photo instructions, rather than continuing a video.
Some of my favorite cards are the ones I make with the recipient in mind. This one is for my daughter for Mother’s Day.
Sheet Music Birds
STEP by STEP Instructions
Cut a piece of Whisper White cardstock 4″ X 5 1/4″. Trim a section of Delightfully Detailed Laser-Cut DSP, place over the white cardstock, creating a stencil. Hold it in place with your hand (or, fasten with removable tape) and apply Pineapple Punch ink with a Sponge Dauber. Press harder, and lighter, to cause variation in tone.
Use a Rectangle Stitched die to cut to size.
Glue to a Thick Whisper White, 4 1/4″ X 5 1/2″ card base.
Stamp a piece of 6″ X 6″ Whisper White cardstock with the Sheet Music background stamp in Black ink. Mine is wood mounted, and I find it gives the best impression, if I ink the stamp with it laying flat, and place the paper on top of it. Use a larger than needed piece of cardstock, then cut to size with a Rectangle Stitched die.
Using a die from the Botanical Tags die set, cut two branches from Granny Apple Green cardstock. Glue the ends in the middle, leaving the border ends free.
Place the Sheet Music, on dimensionals, on top of the branches.
Stamp the sentiment, “Happy Mother’s Day,” from the Itty Bitty Greetings stamp set, and cut with the Classic Label Punch.
Three, Mini-Stampin’ Dimensionals, fit nicely on the back of the sentiment, then place it on the card front.
Use the birds from a Botanical tags die to make one bird in Pineapple Punch cardstock, and one in Powder Pink, so you’ll have a mama and baby bird. Apply tiny strips of dimensionals, and place on the sheet music.
Last, but not least, add a few Iridescent Sequins for a touch of sparkle. Apply a tiny dot of glue where you want the sequins, place the sequins on top, and let dry.
You’ll find the supplies for my completed Mother’s Day card in my Product List below. Thanks so much for hopping my way!
More inspiration awaits! Use the Blog Hop Line-up below to visit the rest of this month’s Design Team. My fellow Pals are excited to show you what they’ve created! Don’t forget to show us some love by commenting on our creations.
I needed one more Easter card, and when I saw the challenge at Fusion, I HAD to use the Bunny Builder Punch. I punched his head, body, and tail from Thick Whisper White cardstock, and used a Sponge Dauber to apply Blushing Bride ink around his edges.
Easter Bunny & Birds
Here is Fusion’s inspirational sketch and photograph:
Instead of brightly, colored eggs, I found a piece of Animal Expedition Designer Series Paper with brightly colored birds and leaves. Doesn’t it look like Spring?
I layered the DSP on a Thick Whisper White card base, and added a strip of Flax Ribbon to match the sketch. TIP: I used Stampin’ Up’s Grid Paper to line up the Tear & Tape to make sure the ribbon would be even.
Two Layering Circle dies were used to create the open circle that Easter Bunny is looking through.
“Happy Easter” is from Teeny Tiny Wishes, which I stamped in Call me Clover ink, and cut with the Classic Label Punch.
Easter Bunny, Circle and sentiment were placed on Dimensionals.
The sentiment, Bunny Builder Punch, and Flax Ribbon are no longer available. If you don’t have a demonstrator, I will stamp, punch and cut some, and mail them to you. Email me at [email protected].
The stamp set being featured this week at What Will You Stamp? is Piece of Cake. I’m happy to report that the coordinating Cake Builder Punch is back in stock, and being shipped to those who had it on back order.
Happily, I received mine yesterday, and made this masculine birthday card in a jiffy.
Crumb Cake
First, I chose the colors: Balmy Blue, Soft Suede, and Pineapple Punch, figuring those could be guy colors. Then, I needed to decide the color of the cake, and I chose Crumb Cake. After laughing about the aptly named color, I stamped the cake in Soft Suede ink on Crumb Cake card stock, and punched it out with my brand new punch. The frosting was colored with the Bronze Stampin’ Blend, which looks like chocolate frosting. Right?
TIP: Use tiny dots with the point of the brush end on the frosting, so it doesn’t bleed over the lines.
Next, I stamped the cake stand in Balmy Blue ink, which would match the Gala Gingham Designer Series Paper layer. Before gluing the Gala Gingham DSP to the Thick Whisper White card base, I embossed it with the Oh My Stars embossing folder to give it some birthday pizzazz.
The cake’s Thick Whisper White background was cut with a Rectangle Stitched die, which I placed on dimensionals in the center of the Gingham. Then, I stamped the candles in Pineapple Punch ink, and positioned the cake and its stand on dimensionals.
The stamp set has some great sentiments, and I chose, “Cake is the answer….” for the front, and “who cares what the questions is!” for the inside. I often leave the inside blank, but had to include this humorous line. This card will be great for a Jeopardy follower, (hee hee).
The Classic Label Punch was used for both, and I added “Happy Birthday” in Balmy Blue ink.
Are you wondering about the nice, Soft Suede, border? It was made with a stamp in the Swirly Frames stamp set.
The last detail was adding a piece of Pineapple Punch DSP to the envelope flap. It’s from the In Colors 6X6 Designer Series Paper. Doesn’t it mimic the candles?
This little cake is the cutest; it almost satisfies my sweet tooth! Thanks for stopping by! You’ll find my supplies in my Product List below, and I appreciate you shopping with me.
P.S. My husband loves this card, so it passes the “masculine” test. And, guess what……he’s a whiz at Jeopardy!
For this week’s Paper Players Design Team challenge, I used one of my favorite bundles from the annual catalog, the Beautiful Bouquet stamp set and Bouquet Bunch dies. Although, this was not an easy decision.
“picked”
I began with Gala Gingham Designer Series Paper on a Balmy Blue card base for LeAnne’s “plaid or checks” theme.
And, fairly quickly, I decided to add a strip of Delightfully Detailed Laser-Cut DSP to the side. I liked how this looked, but, then I was stuck. You wouldn’t believe how many stamp sets I contemplated! Fortunately, once decided, things fell into place.
The bouquet stems were cut from Pear Pizzazz card stock, and the flowers were cut from Petal Promenade DSP. I love the variegated color of the flowers, don’t you? And, the DSP did all the work!
TIP: I layered the flowers on cardstock to make them lay nicely on top of the stems.
Next, I stamped the bow in Pear Pizzazz ink on Whisper White cardstock, and used its die for cutting.
While I was cutting and gluing, I was thinking about how I would apply my chosen sentiment, “I couldn’t have picked a better friend than you.” For those who enjoy puns, this sentiment is a winner! I ended up stamping it in Black ink directly on the Gala Gingham DSP, and my Stamparatus gave me confidence that I wouldn’t make a mistake.
TIP: If you aren’t familiar with a Stamparatus, click on the picture in my Product List to read about it. And, continue clicking to purchase from my store. “smile”
Other than taking too much time, I’m happy with today’s friendship card. As they say, “all’s well that ends well.” Enjoy your day!
This is my first project using the Geared Up Garage bundle, a gift from my friend and fellow demonstrator, Jennifer Michalski. Thank you Jennifer!
Geared Up Garage
This card came together quickly, because I used two challenges to determine the ingredients. The layout is from Freshly Made Sketches.
And, the colors are from TGIF.
I couldn’t wait to run the Gears die through the Big Shot! I first used Mango Melody cardstock, but ended up using Thick Whisper White. I wanted the gears to have a mottled look, that Sponge Daubing with With Mango Melody ink on white cardstock would give.
The most time consuming part of the project was applying tiny pieces of dimensionals to the gears.
TIP: Cut a skinny, horizontal, strip from the outside, “waste.” Then, snip vertically, and apply one at a time.
The Rectangle Stitched dies made easy work of the remainder of the project. The largest rectangle is Bermuda Bay, topped with a rectangle of Granny Apple Green. And, the smallest rectangle holds the sentiment.
The sentiment, “All geared up to celebrate,” is from the Geared Up Garage stamp set, stamped in Bermuda Bay ink.
I sprinkled on a few Iridescent sequins, and this will make a bright and cheery, masculine, birthday card.
Thank you for visiting my Geared Up Garage. Have a great day!
Enter your email below to receive each of my new posts by email!
Archives
Categories
Disclaimer
My name is Su Mohr, Independent Stampin' Up! Demonstrator. I am responsible for the content on this site. Stampin' Up! does not endorse the use of or contents of the classes, services, or non-Stampin' Up! products I may offer here.