Jun 6, 2017 | Gallery, Hand-Crafted Cards |
Inspired by nature…
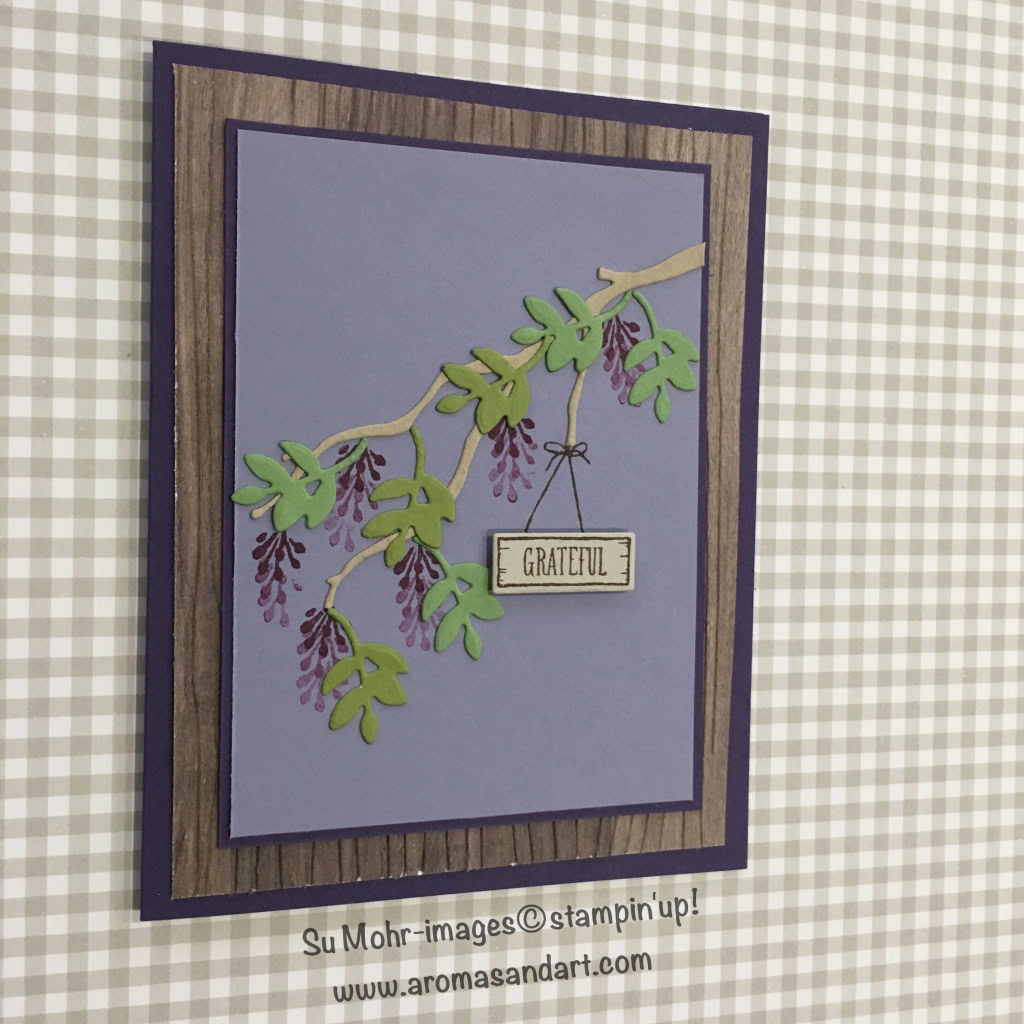
The fragrance from the wisteria permeates the area around the gazebo that it covers. The flowers of varying shades of purple are gorgeous. In the winter, after the flowers are gone and the leaves have fallen, there is a beautiful wood vine remaining. Somehow, I wanted to translate this into paper and ink.
I began with our cardstock named Wisteria Wonder. Perfect! Another purple, Elegant Eggplant, became the card base. To mimic the vine, a piece of the Wood Texture Designer Series Paper was run through the Big Shot with the Woodgrain embossing folder, and layered on the card base. The vine branch was cut with a Seasonal Layers die, and the greenery is from a Lovely Laurel die. This little leaf in Old Olive and Wild Wasabi seemed just right. I had to hunt for a stamp that would make the flowers, and found it in the Avant-Garden stamp set. I stamped it with Rich Razzleberry three times without re-inking to give it a layered look.
For the sentiment, I found “grateful” in the At Home with You stamp set. I recalled my post entitled “Grateful” from Memorial Day weekend as I tied it to the vine.
I popped up “GRATEFUL” on it’s little sign, and grateful I truly am.


Jun 5, 2017 | Gallery, Hand-Crafted Cards |
.
This adorable, backward girl is part of the Birthday Delivery bundle, and already a favorite of mine. This brings back memories of playing paper dolls, because I cut her dress from Designer Series Paper, and glued it on for a perfect fit without the tabs. True confession: I used to cut off the tabs of my paper doll’s clothes. I guess, because I thought they didn’t look as cute, and I preferred quick changes. Did you like to play paper dolls?
The brick wall was made with the embossing folder on page 210 of the catalog, on the cardstock color, Very Vanilla. This was layered on a Soft Sky card base, which matches her dress. “Happy Birthday,” in the color of Crumb Cake, was made with a thinlit die on page 213.

I don’t know if this sweet girl wrote graffiti on the wall, or if she was a commissioned artist. I do know, she wanted to wish someone special a big, happy birthday.
Jun 3, 2017 | Gallery, Hand-Crafted Cards |
Another week, another CAS(E) this Sketch challenge. This card developed, because I needed masculine birthday cards, and I wanted to use our new Colorful Seasons Bundle.

Sahara Sand was chosen for the art piece, and the same color was used to stamp the larger leaf from the Colorful Seasons stamp set. The die from Seasonal Layers was used to cut the three leaves from Lemon Lime Twist (new In Color), Tranquil Tide (new In Color), and Crumb Cake (matches the card base). Here’s a TIP: The leaves were attached by using one Mini Glue Dot. They are secure, yet free to flutter.
A piece of Washi Tape lines the left side of the card. Note to self: Use Washi Tape more often! Honestly, I forget. Something I don’t forget to use is the Classic Label Punch, and the Teeny Tiny Wishes which fit perfectly for a fast and easy sentiment. I could hardly wait to apply the three Glitter Enamel Dots, matching the sketch exactly! 
The Colorful Seasons Bundle is becoming a favorite. Thank you, Hannelie, for the inspiration for this card.
Jun 2, 2017 | Gallery, Hand-Crafted Cards |
Wrapped like a birthday present, this card features the new 1/4″ Double-Stitched Ribbon in Daffodil Delight. It also comes in Blushing Bride, a beautiful shade of pink, and Cherry Cobbler, a favorite red for holiday cards. One side has the crisscross stitching, and the reverse side has two rows of straight stitching. Tear Tape, pictured below, was the perfect adhesive for making the ribbon stick.
The Whisper White “wrapping paper” was embossed with the Petal Burst folder, and layered on a Daffodil Delight card base. The Daisy Punch cut the daisy, after it was stamped using the Daffodil Delight ink pad. Stampin’ Up makes it so easy by coordinating everything. The center of the daisy was stamped with Old Olive ink, and the 1/2″ Circle punch was just the right size for cutting. “Happy Birthday to you” was die cut with a square Stitched Shape. Do you like the stitching around the edge? I use these dies a lot, because I like the added detail.
The daisy and “gift tag” were popped up, adding dimension to the card. Yellow is a cheery, summer color, and this card is ready to wish someone a very happy birthday!
May 31, 2017 | Gallery, Hand-Crafted Cards |
For this weeks’ Global Design Project #088 challenge, I combined the colors of pink and green, a favorite combination.
After running the Always Artichoke cardstock through the Big Shot with the Woodland embossing folder, it was layered on Blushing Bride, and a Crumb Cake card base.
A Flourish Die cut the bundle of leaves from Old Olive, Crumb Cake, and Copper Foil. 
The three sprigs were tied with Linen Thread, and loosely popped up on a dimensional.
“Enjoy your special day,” from the Dragonfly Dreams stamp set was stamped in Always Artichoke on Crumb Cake cardstock, cut with a die from Cupcake Cutouts. I like using an upholsterer’s pin for manipulating the sticky backed enamel embellishments.
Thank you Shawn de Oliveira for the inspiration.
May 30, 2017 | Gallery, Hand-Crafted Cards |
My completed card for Global Design Project #089. Just scroll down, if you’d like details.

This week’s GDP #089 is a color challenge using Calypso Coral, Old Olive and Basic Black. I gathered a few things together on my work table to begin my thinking process. The retired “In the Lines” Designer Specialty Paper was calling to me, because it had just the right amount of black and white. I’m looking forward to the new “Just Add Color” DSP, featured on pages 166-167 of the new catalog. The Stampin’ Up samples are gorgeous. Until then, I’ll use what I have.
Next, I chose this Old Olive print from the new Delightful Daisy DSP. I wanted to layer it on Basic Black, and decided to add interest by using our new Ticket Tear Border Punch.
I’m sure my Stampin’ Up friends are familiar with this set of dies, Stylish Stems. Can you see how I used them?
Most of my cards have a sentiment, and this “you” is a thinlit die from a retired set, Hello You. I like to layer the paper words, because it gives a nice shadowing effect. “It’s all about you” is also from a retired stamp set, Endless Birthday Wishes. I placed the entire art piece on foam strips to lift it from the Old Olive card base. Can you see the shadows?
For the final touch, a new Glitter Enamel Dot was placed at the center of the Calypso Coral flower.

I enjoy combining old with new. I must admit, I’m a lifetime member of the “Clean Your Plate Club”. I just can’t stand to waste anything!