Jun 25, 2020 | Gallery, Hand-Crafted Cards |
I’m having fun with the Playful Alphabet Dies and the new Foam Adhesive Sheets. So, here’s another masculine birthday card, which I always need.

YAY! It’s your DAY!
Instructions
Cut Thick Whisper White Cardstock to 8 1/2″ X 5 1/2″, fold in the middle at 4 1/4″.
Layer with Whisper White Cardstock, 4″ X 5 1/4″, embossed with the Absolutely Argyle Embossing Folder.
Use a Stitched Nested Labels Die to cut the hexagon from Misty Moonlight Cardstock.
Use a size smaller hexagon to cut from Whisper White Cardstock, and glue the hexagons together.

To make “YAY!” cut 1/8″ strips of each of the new In Colors from the In Color 6X6 Designer Paper. You can see the four patterns in my Product List.
Cut a 2 1/4″ X 1″ piece of Foam Adhesive Sheets. Remove one paper, revealing the sticky surface, and adhere the strips of DSP, alternating the colors.
Place the Playful Alphabet Dies on the strips, and run through the die cutting machine. Turn it over, run through a second time, to insure a good cut.

Remove the paper backing, and stick the letters to your card front. I noticed I poked holes through the DSP. I’ll try being gentler next time.
“It’s your day!” is from the Itty Bitty Birthdays Stamp Set. Stamp it in Misty Moonlight Ink on Whisper White Cardstock, and cut with a smaller Stitched Nested Die. Place it on Two Dimensionals with the right side hanging over a bit, and your card is complete.

I was inspired by Fab Friday.

Read about my June gifts:

“Whisper White 1/4″ Crinkled Seam Binding Ribbon features a crinkly texture. This flexible and soft craft ribbon is easy to work with. Tie it around cards, add it to tags, or use it for treat packaging. You can also dye this ribbon to customize the color for any project using our Classic Stampin’ Ink Refills or Stampin’ Blends (sold separately).” * 1/4″ * 10 yards
Just add my Host Code (TPYR7XQ2) in the box provided when you order a minimum of $50.00 in the month of June, and I will send the ribbon to you in July.
This month’s drawing will be for one of the favorite stamp sets from Sale-A-Bration, The Gang’s All Meer. Cute, huh?Your name will be entered in the drawing when you place a minimum $100 order in June. I’ll announce the winner July 1st.

Be sure to check out the new catalog that was just released June 3rd. You can click on the cover beneath my photo, which takes you to a page where you can download the PDF, and scroll through the 192 pages of delight.
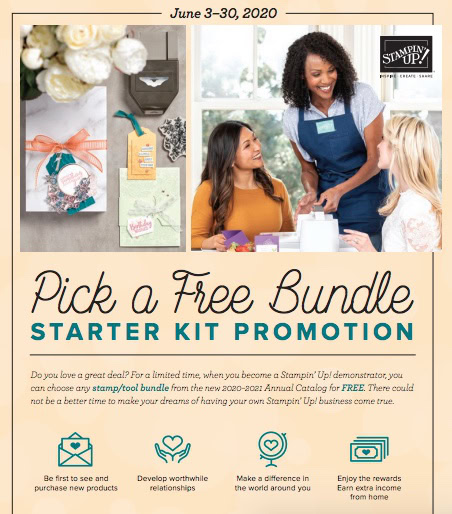
If you’re thinking of ordering close to $100.00, why not get the Starter Kit that includes $125.00 in PRODUCT OF YOUR CHOICE, plus FREE SHIPPING, plus SPECIAL JUNE BONUS of FREE BUNDLE OF YOUR CHOICE!!!!
Click here to join and get your Starter Kit:
Thanks for stopping by! Have a wonderful day!

Product List
Jun 24, 2020 | Gallery, Hand-Crafted Cards, TGIF |
It’s fun to stamp your own background paper. Keep scrolling to see how you can create this card.

background stamping
INSTRUCTIONS
Cut Thick Whisper White Cardstock to 8 1/2″ X 5 1/2″, fold in the middle at 4 1/4″.
Layer with Whisper White Cardstock, 4″ X 5 1/4″, embossed with the Subtle Textured Embossing Folder.
Cut a second piece of Whisper White Cardstock, 2 1/4″ X 5 1/2″, emboss with a Greenery Embossing Folder, and adhere to the middle of the card front. (See above photo).
Use the largest Stitched So Sweetly Die to cut a third piece of Whisper White Cardstock. Randomly stamp the flower from Butterly Wishes, and adhere this layer as shown. TIP: Glue in the middle, leaving the right and left edges free, because they are higher.
I used Blushing Bride Ink, but this flower would be pretty in any color.

Now for creating “you” with the Playful Alphabet Dies. Cut a 2″ X 1″ piece of Foam Adhesive Sheet, remove one side of the paper, and attach a 2″ X 1″ piece of Blushing Bride Cardstock. Place the y-o-u dies on top of the cardstock, and run it through your die cutting machine. Turn it over, and run through a second time to insure a good cut. Free the letters, remove the other side of paper, and stick to your card front. The removal dots show, but I think it adds character, right?

Stamp “Make Me Smile” in Memento Black Ink on Whisper White Cardstock, and cut with a Stitched So Sweetly Die. Adhere with glue under “make” and a Dimensional under “smile.”
Add a few Woven Thread Sequins for sparkle.
Wasn’t that fun? Now you can stamp your own background!

TGIF was my inspiration.

Read about my June gifts:
“Whisper White 1/4″ Crinkled Seam Binding Ribbon features a crinkly texture. This flexible and soft craft ribbon is easy to work with. Tie it around cards, add it to tags, or use it for treat packaging. You can also dye this ribbon to customize the color for any project using our Classic Stampin’ Ink Refills or Stampin’ Blends (sold separately).” * 1/4″ * 10 yards
Just add my Host Code (TPYR7XQ2) in the box provided when you order a minimum of $50.00 in the month of June, and I will send the ribbon to you in July.
This month’s drawing will be for one of the favorite stamp sets from Sale-A-Bration, The Gang’s All Meer. Cute, huh?Your name will be entered in the drawing when you place a minimum $100 order in June. I’ll announce the winner July 1st.
Be sure to check out the new catalog that was just released June 3rd. You can click on the cover beneath my photo, which takes you to a page where you can download the PDF, and scroll through the 192 pages of delight.
If you’re thinking of ordering close to $100.00, why not get the Starter Kit that includes $125.00 in PRODUCT OF YOUR CHOICE, plus FREE SHIPPING, plus SPECIAL JUNE BONUS of FREE BUNDLE OF YOUR CHOICE!!!!
Click here to join and get your Starter Kit:
Thanks for stopping by! Have a wonderful day!
Product List
Jun 23, 2020 | Gallery, Hand-Crafted Cards |
The images in the Prized Peony Stamp Set are beautiful, and I really like the way the flower looks in black & white. This is a great card for beginning stampers, with my “easy-to-make” instructions below.

Simple Peony
Step by Step Instructions:
Cut Thick Whisper White Cardstock to 8 1/2″ X 5 1/2″, and fold in the middle at 4 1/4″ to make your card base.
TIP: Use the Stampin’ Trimmer scoring tool for a nice, neat fold.
Use the largest Stitched Rectangles Die to cut the first layer from Basic Black Cardstock.
Use the second largest Stitched Rectangles Die to cut the top layer from In Color 6X6 DSP (Magenta Madness).

Use the largest Stitched So Sweetly Die to cut the label from Thick Whisper White Cardstock.
Stamp the flower from the Prized Peony Stamp Set in Memento Black Ink at the top of the label.

Stamp “my friend” from the Ornate Thanks Stamp Set in Memento Black Ink, as shown.
TIP: Curve it slightly on the Acrylic Block to fit the curve of the label. This is one of the advantages of photopolymer stamps, they bend.
Place the label on Dimensionals, and you’re done! Now you can send the card to someone to brighten their day.

My inspiration was from CAS(E) this sketch.

Read about my June gifts:
“Whisper White 1/4″ Crinkled Seam Binding Ribbon features a crinkly texture. This flexible and soft craft ribbon is easy to work with. Tie it around cards, add it to tags, or use it for treat packaging. You can also dye this ribbon to customize the color for any project using our Classic Stampin’ Ink Refills or Stampin’ Blends (sold separately).” * 1/4″ * 10 yards
Just add my Host Code (TPYR7XQ2) in the box provided when you order a minimum of $50.00 in the month of June, and I will send the ribbon to you in July.
This month’s drawing will be for one of the favorite stamp sets from Sale-A-Bration, The Gang’s All Meer. Cute, huh?Your name will be entered in the drawing when you place a minimum $100 order in June. I’ll announce the winner July 1st.
Be sure to check out the new catalog that was just released June 3rd. You can click on the cover beneath my photo, which takes you to a page where you can download the PDF, and scroll through the 192 pages of delight.
If you’re thinking of ordering close to $100.00, why not get the Starter Kit that includes $125.00 in PRODUCT OF YOUR CHOICE, plus FREE SHIPPING, plus SPECIAL JUNE BONUS of FREE BUNDLE OF YOUR CHOICE!!!!
Click here to join and get your Starter Kit:
Thanks for stopping by! Have a wonderful day!
Product List
Jun 22, 2020 | Gallery, Global Design Project, Hand-Crafted Cards |
It’s so much fun using new products, and I’ve been looking forward to playing with the new bundle, Nothing’s Better Than. I have a sweet tooth, and I love this sentiment, ” Today’s plan: consume cookies.” Sometimes the truth hurts, and it can also be funny! LOL.

Consume Cookies
Follow these instructions, if you’d like to duplicate this card, so you’ll have cookies to consume:
Begin with a 4 1/4″ x 5 1/2″ card base of Rich Razzleberry Cardstock.
Cut a 1″ X 5 1/4″ strip from the new Rainbow Glimmer Paper, and glue to the right side of a 4″ X 5 1/4″ Whisper White Cardstock layer. It comes with two 12″ X 12″ pieces in a pack, and a little will go a long way.
For the word, “cookies,” cut a 2 1/4″ X 1″ piece of a Foam Adhesive Sheet. Peel the paper from one side, and adhere the same size piece of Rainbow Glimmer Paper. Place the Love You More Than Die on top, and run it through your die cutting machine. TIP: Run it through several times, if necessary, until there’s a clean cut.

Stamp four cookies in Early Espresso Ink on Whisper White Cardstock, and one on Crumb Cake. Color them by using the “solid” cookie stamp, stamped in Crumb Cake Ink. I stamped off on three of them.
Use the Love You More Than Die for cutting, and place them on Dimensionals.

Stamp the sentiment in Blackberry Bliss Ink on Whisper White Cardstock, cut with a Stitched So Sweetly Die, and place on Dimensionals.

You can see how the Global Design Project sketch provided inspiration for my design. I first saw bubbles, but they turned into cookies. What do you see? Come join the fun, and play along.

Read about my June gifts:
“Whisper White 1/4″ Crinkled Seam Binding Ribbon features a crinkly texture. This flexible and soft craft ribbon is easy to work with. Tie it around cards, add it to tags, or use it for treat packaging. You can also dye this ribbon to customize the color for any project using our Classic Stampin’ Ink Refills or Stampin’ Blends (sold separately).” * 1/4″ * 10 yards
Just add my Host Code (TPYR7XQ2) in the box provided when you order a minimum of $50.00 in the month of June, and I will send the ribbon to you in July.
This month’s drawing will be for one of the favorite stamp sets from Sale-A-Bration, The Gang’s All Meer. Cute, huh?Your name will be entered in the drawing when you place a minimum $100 order in June. I’ll announce the winner July 1st.
Be sure to check out the new catalog that was just released June 3rd. You can click on the cover beneath my photo, which takes you to a page where you can download the PDF, and scroll through the 192 pages of delight.
If you’re thinking of ordering close to $100.00, why not get the Starter Kit that includes $125.00 in PRODUCT OF YOUR CHOICE, plus FREE SHIPPING, plus SPECIAL JUNE BONUS of FREE BUNDLE OF YOUR CHOICE!!!!
Click here to join and get your Starter Kit:
Thanks for stopping by! Have a wonderful day!
Product List
Jun 21, 2020 | Gallery, Hand-Crafted Cards |
Just when you think you’ve seen all the flowers, the Prized Peony comes along! I couldn’t wait to see the flower in Vellum, and I wasn’t disappointed.
Keep scrolling to see my easy-to-follow instructions, and supplies in my Product List.

Vellum Peony
Step by Step Instructions:
Cut Gray Granite Cardstock to 8 1/2″ X 5 1/2″, and fold in the middle at 4 1/4″ to make your card base. Layer the card base with Peony Garden Designer Paper, 4″ X 5 1/4″.
Make a Whisper White Cardstock panel, 3″ X 5 1/4″, and use the Peony Border die to cut both sides of the panel. Glue to the middle of your card front.


Now for the gorgeous peony, which will take some explaining. Opening this pack of dies can be intimidating, especially for someone new to stamping, so I made a chart. Five images in the stamp set have dies for cutting. Plus, there is one border “trim” die, five “build-a-peony” dies, three leaf dies, and three leaf detail dies.

Use #1- #5 “build-a-peony” dies to cut from Vellum Cardstock. They will slide into one another (smallest to largest) through the openings. Before putting together, use a Sponge Dauber to apply Petal Pink Ink to the petals and Bumble Bee Ink to the stamen. Apply small dots of glue at the bottom of the petals, as you slide them into place. Add glue to the middle of the back of the completed flower, and attach to the panel.
Cut three leaves from Vellum, and color with a Sponge Dauber and Pear Pizzazz Ink. Cut the same leaves from Whisper White Cardstock, and use a tiny dot of glue at the base to attach to the Vellum leaves. Slide the leaves beneath the flowers with a dot of glue.

Stamp the sentiment, from the Prized Peony Stamp Set, in Gray Granite Ink on Whisper White Cardstock. Use a Stitched So Sweetly Die for cutting, and place on Dimensionals.

I think you will be pleased with your completed card. My husband said this is one of his all time favorites.
Read about my June gifts:
“Whisper White 1/4″ Crinkled Seam Binding Ribbon features a crinkly texture. This flexible and soft craft ribbon is easy to work with. Tie it around cards, add it to tags, or use it for treat packaging. You can also dye this ribbon to customize the color for any project using our Classic Stampin’ Ink Refills or Stampin’ Blends (sold separately).” * 1/4″ * 10 yards
Just add my Host Code (TPYR7XQ2) in the box provided when you order a minimum of $50.00 in the month of June, and I will send the ribbon to you in July.
This month’s drawing will be for one of the favorite stamp sets from Sale-A-Bration, The Gang’s All Meer. Cute, huh?Your name will be entered in the drawing when you place a minimum $100 order in June. I’ll announce the winner July 1st.
Be sure to check out the new catalog that was just released June 3rd. You can click on the cover beneath my photo, which takes you to a page where you can download the PDF, and scroll through the 192 pages of delight.
If you’re thinking of ordering close to $100.00, why not get the Starter Kit that includes $125.00 in PRODUCT OF YOUR CHOICE, plus FREE SHIPPING, plus SPECIAL JUNE BONUS of FREE BUNDLE OF YOUR CHOICE!!!!
Click here to join and get your Starter Kit:
Thanks for stopping by! Have a wonderful day!
Product List
Jun 20, 2020 | Gallery, Hand-Crafted Cards |
If you need a last minute Father’s Day card, this could do the trick. Or, it could be a birthday card as well. The In Good Taste Designer Paper “makes” this card!

Happy Day
Step by Step Instructions:
Cut Gray Granite Cardstock to 8 1/2″ X 5 1/2″, and fold in the middle at 4 1/4″ to make your card base.
TIP: Use the Stampin’ Trimmer scoring tool for a nice, neat fold.
Use the largest Stitched Rectangles Die to “saw” the wood layer from In Good Taste Designer Paper. Frame it with Misty Moonlight Cardstock, giving it a 1/16th” border.
Use the third largest Stitched Rectangles Die to cut the top layer from In Good Taste DSP. Doesn’t it look like an oil painting?

Stamp the relaxing man from A Good Man Stamp Set in Night of Navy Ink on the “oil painting.” Use Stampin’ Blends for coloring, which are named in my Product List below.
Stamp “relax your way,” from A Good Man Stamp Set, in Night of Navy Ink.

The words “Happy Day” are from the Word Wishes Die Set. Cut the words from Night of Navy Cardstock, and a second time from Misty Moonlight Cardstock. Glue them together for thickness, with Misty Moonlight on top, and your card is complete.

Read about my June gifts:
“Whisper White 1/4″ Crinkled Seam Binding Ribbon features a crinkly texture. This flexible and soft craft ribbon is easy to work with. Tie it around cards, add it to tags, or use it for treat packaging. You can also dye this ribbon to customize the color for any project using our Classic Stampin’ Ink Refills or Stampin’ Blends (sold separately).” * 1/4″ * 10 yards
Just add my Host Code (TPYR7XQ2) in the box provided when you order a minimum of $50.00 in the month of June, and I will send the ribbon to you in July.
This month’s drawing will be for one of the favorite stamp sets from Sale-A-Bration, The Gang’s All Meer. Cute, huh?Your name will be entered in the drawing when you place a minimum $100 order in June. I’ll announce the winner July 1st.
Be sure to check out the new catalog that was just released June 3rd. You can click on the cover beneath my photo, which takes you to a page where you can download the PDF, and scroll through the 192 pages of delight.
If you’re thinking of ordering close to $100.00, why not get the Starter Kit that includes $125.00 in PRODUCT OF YOUR CHOICE, plus FREE SHIPPING, plus SPECIAL JUNE BONUS of FREE BUNDLE OF YOUR CHOICE!!!!
Click here to join and get your Starter Kit:
Thanks for stopping by! Have a wonderful day!
Product List





