Nov 8, 2018 | Gallery, Hand-Crafted Cards |
A wreath on the front door is a welcoming holiday tradition. This wreath uses all of Stampin’ Up’s fabulous Foil Paper in the colors of Gold, Silver, Champagne, and Copper on a 5 1/2″ X 4 1/4″ card.

Metallic Wreath Holiday Card
The frame for the wreath was cut with a Beautiful Layers die from the new Galvanized Metallic Paper. It made a nice, sturdy place to attach the leaves, which were also die cut from the Beautiful Layers set.

I snipped the center from the “wreath,” so it would be open to the background. The background is a piece of Wood Textures Designer Series Paper that I gave more texture to with the Pinewood Planks embossing folder.
I tied the wreath at the top with Braided Linen Trim.

You “Season’s Greetings From Our Home To Yours” is from the Merry Christmas To All stamp set, and cut with a die from the Merry Christmas die set.

My circular wreath fits this week’s challenge at Freshly Made Sketches perfectly, don’t you think?

Thank you for visiting me today, and I hope you enjoy creating some wreaths for the holidays! Keep scrolling to see my supply list.

Product List
Nov 7, 2018 | Gallery, Hand-Crafted Cards |
The Sprited Snowmen stamp set is so endearing, and this couple “warms my heart.”

“Your friendship warms my heart”
I stamped the snowman and snowlady in Gray Granite ink on Thick Whisper White cardstock. They were surprisingly easy to fussy cut (no deep cuts) with my Paper Snips. I used nine Stampin’ Blends markers for coloring: Light and Dark Pool Party, Light and Dark Old Olive, Light Bermuda Bay, Dark Crumb Cake, Light Smoky Slate, Light Cerry Cobbler, and Dark Pumpkin Pie. The colors are pictured below in my Product List.

To create their snowy scene, I used the Softly Falling embossing folder on Whisper White cardstock. I layered this on Pool Party cardstock, on a Gray Granite card base. The tree was created with a die from In The Woods, cut from Galvanized Metallic paper. You can see it shine, in person.
The sentiment is from the Spirited Snowmen stamp set, and fits this couple perfectly, “Your friendship warms my heart.” I used a label die from the Merry Christmas die set for cutting.

My inspiration for today’s card is from the Global Design Project theme, celebrating 30 years with Stampin’ Up!

Thank you for stopping by today. “Your friendship warms my heart.”
Product List
Nov 6, 2018 | Gallery, Hand-Crafted Cards |
The theme this month is “thank you,” which is appropriate for those celebrating Thanksgiving.

Woodsy Thank You
The theme at Paper Players this week is “give thanks,” so I’m sharing my woodsy, “Thank You” card in their gallery also.

I began by using the Thank You die to cut the words from Gold Foil Paper. I also used dies to cut the bird (Birds & Blooms die set), the wood carvings (Detailed Deer die set), and the tip of a branch (Seasonal Layers die set).

My card could have gone in many directions with the Gold Foil “Thank you,” but it landed on Wood Textures Designer Series Paper. I adore the realism of the paper, and this particular sheet is my favorite in the pack. Foam Adhesive Strips were used to raise the wood for extra dimension, as well as tiny pieces of the Foam Adhesive Strips to support “Thank you.” This was all propped up on a Soft Suede card base.

It was only right to use my favorite paper from the Festive Farmhouse Designer Series Paper, which is the red plaid you see through the square hole. It makes me feel warm and cozy just looking at it. My little bird of Gold Glimmer Paper, perched on the tip of a branch, likes looking at it too.
The three wood carvings at the bottom were the last detail. Doesn’t it look like the work of turn-of the-century furniture makers? The carvings were actually made with three, little, dies from the Detailed Deer die set, and the same Wood Textures DSP.

Thank you so much for visiting my blog!
Product List
Nov 5, 2018 | Gallery, Hand-Crafted Cards |
Welcome to What Will You Stamp? This week’s challenge is using the Country Home stamp set.

Country Home Pitcher
We’d love to see you create something from this set for our gallery. Please join the fun!

My mother collected antiques, and she would have loved this graniteware enamel teapot. She didn’t even mind a little rust. These things are not cheap, and you’d be lucky to find one today for under $100.00. Good thing I like miniature, paper ones!

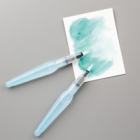
While I was thinking of Mama, I turned our Country Home pitcher into graniteware by using a Balmy Blue Watercolor Pencil and an Aquapainter. I first stamped the pitcher in Night of Navy ink on Thick Whisper White cardstock. Then, I colored the sides of the pitcher with my pencil, brushing the color towards the center with my Aquapainter.

I intended to leave the pitcher on its square of Whisper White cardstock, cut with a Stitched Shapes die, so I had to figure out a way for foliage to come from its mouth. My solution was to punch a hole at the top of the pitcher, stick the foliage through the hole, and tape it to the back. To insure the hole was hidden, I added a bow of Braided Linen Trim.
The leaves (Old Olive cardstock) and the branch (Thick Whisper White cardstock) are from the Frosted Bouquet die set.

While my Night of Navy ink pad was handy, I stamped the sentiment (Country Home stamp set) on a piece of Wood Textures Designer Series Paper. I used the same Stitched Shapes die for cutting the square of Wood Textures, and backed it with Night of Navy cardstock, cut with a Layering Squares die.

My idea for the layout is from Fab Friday’s challenge.

My two squares needed a background, so I used the same Wood Textures Designer Series Paper, and embossed it with the Tin Tile embossing folder. This wood blends nicely with its Gray Granite card base. I’m finding that Gray Granite is a fabulous neutral color.

Thank you for stopping by. Remember, we’d love to see your creations, using Country Home, in our gallery at What Will You Stamp?
Product List
Nov 4, 2018 | Gallery, Hand-Crafted Cards |
The Serene Garden has been my favorite stamp set for coloring. I love the stylized design, and the ease of coloring within the lines.

Serene Garden Thank You
It’s especially easy to color within lines that have been heat embossed. Today, I used Gold Embossing Powder on Sahara Sand cardstock. First, I placed the two Serene Garden stamps on the Stamparatus, positioned over the Sahara Sand cardstock. Second, I covered the stamps with VersaMark, and stamped the cardstock, repeating a second time to insure good coverage. Third, I sprinkled the Gold powder over the stamped images, shaking off the excess, and drying with the Heat Tool.

My favorite tool for coloring has become the Stampin’ Blends. I used Dark Old Olive and Dark Granny Apple for the leaves, Bronze for the stems, and Light and Dark Calypso Coral for the flowers.

There was so much detail in the images, I chose Sahara Sand for “Thank You,” so it would blend in. I cut three Thank Yous with the die, layering for dimension. And, I couldn’t help myself, I ran the top “Thank You” through the Big Shot with the Subtle Textured embossing folder.

After gluing “Thank You” to my colored Serene Garden, and layering this on a Sahara Sand card base, my card was almost complete. Those pretty Iridescent sequins had to make an appearance!

I’m sharing my Thank You card with Festive Friday, because it’s perfect for their “Thank You” theme.

Thank you for checking out my Thank You card. I’m wishing you a wonderful day! Keep scrolling to see my supply list, and click on the pictures to go shopping.
Product List
Nov 3, 2018 | Gallery, Hand-Crafted Cards |
Are you ready to see a Fall, masculine, birthday card?

Fall Birthday Colors
I was inspired by the color challenge at TGIF.

I’m also sharing with the “foliage” challenge at Seize the Birthday.

Crumb Cake is my favorite neutral color, and always a good choice for a masculine card. So, Crumb Cake would be my card base, layered with Cajun Craze, and Merry Merlot (Joyous Noel Designer Series paper) on top.
Before gluing the layers together, I used the Subtle Textured embossing folder on the Merry Merlot DSP to turn it magically into fabric. Then, I wrapped it with Gold Metallic Thread, which I taped to the back.

The word “Happy” is in the Merry Christmas die set, and I happily cut the word from Copper Foil. The die set didn’t, however, have the word “birthday.” After searching a bit, I ended up using “Happy Birthday” from the Lemon Zest stamp set. I used Copper Powder for heat embossing the two words on Merry Merlot cardstock, cut it with a Merry Christmas label die, and then gave it the Subtle Texture treatment.

The two sprigs, one in Cajun Craze, and one in Merry Merlot, are from the In the Woods die set.

Thank you for reading through my blog today. I hope you were inspired by my “Happy Happy Birthday” card. Keep scrolling to see my Product List.
Product List