Jul 19, 2019 | Gallery, Global Design Project, Hand-Crafted Cards |
I think we all agree that Piggy is cute. And, I love that she believes she can fly!

Piggy believes!
Piggy, from This Little Piggy Stamp Set, was stamped in Memento Black Ink on Whisper White Cardstock. Then, I colored her with Stampin’ Blends in the pig colors of Light Petal Pink and Light Calypso Coral. She was in a circle, but she “believed” I could cut her out by hand, “so I did.”

Piggy’s sky was created with a Seaside Spray card base and a layer of the same cardstock embossed with the Swirls & Curls Embossing Folder. She likes a swirly breeze for flying.
The clouds were made with the Pretty Label Punch, which she thought was the perfect shape for a cloud.
Piggy especially likes her sentiment, “She believed she could…” on the checked Designer Paper. It fit just right in the smallest, Rectangles Stitched Die, atop the white Baker’s Twine, that we tied around the middle.

Global Design Project showed us where to place everything.

Piggy insisted we complete the sentiment, “…so she did.” on the inside.

Thank you for flying by! You can see Piggy’s supplies in the Product List below. Have a great day!
Product List
Jul 18, 2019 | Gallery, Hand-Crafted Cards |

Happy Thursday to you! Today’s card is my second as a Seize the Birthday Party Guest Designer. The theme, or “Toppings,” for the next two weeks is “rainbow,” so I created whimsical, rainbow, daisies.

Rainbow Daisies
I began by using Stampin’ Blends to color a rainbow across Whisper White Cardstock. I used these colors, in this order: Light Poppy Parade, Light Pumpkin Pie, Light Daffodil Delight, Light Old Olive, Dark Pool Party, and Light Highland Heather. They are in my Product List below. Then, I used the Medium Daisy Punch to cut six daisies, moving across my colored rainbow.

Next, I shaped the petals with my Bone Folder. It’s not a tool I mention often, but it really comes in handy.
TIP: Hold the daisy firmly in the center with one hand. With the other hand, gently curl the petals with the Bone Folder in a downward motion.

After curling, glue two petal rounds together at the the center. Use the 1/2″ Circle Punch to create the centers from Designer Series Paper. This dot has retired, but you can use your imagination.
I wanted my whimsical daisies to stand out against their background, and chose a Thick Whisper White card base with a layer of Whisper White cardstock. Texture was added with an Friendly Silhouettes die-cut of foliage across the bottom.

All that remained was the sentiment, “Birthday Wishes,” (Birthday Wishes Stamp set) that I stamped in Memento Black Ink.

Thank you for visiting! I’m looking forward to seeing your birthday cards in the Seize the Birthday Gallery!

Product List
Jul 17, 2019 | Gallery, Hand-Crafted Cards, TGIF |
I’ve been thinking about making a wood carved magnolia with Magnolia Memory Dies, and today is the day.

Wood Magnolia
This piece of wood is from the Pressed Petals Designer Series Paper, and I used a Magnolia Memory Die to cut two sets of petals. Two additional sets of petals were cut from Soft Suede Cardstock, for layering, to give the flower a thick, wood look and feel. The burlap leaves (Pressed Petals DSP) were also cut with Magnolia Memory Dies.

The background is another piece of Pressed Petals DSP, layered on a Mossy Meadow card base, and you can see I used the DSP for photographing also. Guess I like this paper!

Whenever I use wood, I feel it’s suitable for a man, and I’m always needing masculine birthday cards. “Happy Birthday” is from the Piece of Cake Stamp Set. It’s stamped in Early Espresso Ink on burlap DSP and cut with the smallest Stitched Rectangles Die.

I wanted to use this shape, because of the TGIF challenge.

Thank you for stopping by. I hope this gives you some ideas for masculine cards.
Keep scrolling to see my Product List, where clicking on the photos takes you to my store for shopping!
  Product List
Jul 16, 2019 | Gallery, Hand-Crafted Cards |
I have been fascinated with the Pressed Petals Washi Tape, and this idea came to me; to make a heart with them.

Heart of Petals
First, I found the heart shape in the Be Mine Stitched die set. Using the heart die as a reference, I peeled and stuck the Washi Tape Petals on Thick Whisper White Cardstock. When satisfied with the coverage, I cut the heart, added a second, White Cardstock heart for thickness, and placed it on Dimensionals.
TIP: I started at the top of the heart, overlapping, and working my way to the bottom.

The background is regular Whisper White Cardstock that I embossed with the Eyelet Lace Embossing Folder. The scalloped edge was made by cutting all four sides with a die that is also from the Be Mine Stitched Die Set.

“Forever” is from the Sweet Silhouette Die Set, cut from Thick Whisper White Cardstock. Since the “f” and “r” would be hanging over the heart, I added a second layer for sturdiness.

My clean & simple design was inspired by CAS(E) this sketch.

If you missed my first card using the Pressed Petals Washi Tape, here it is:

Washi Tape Petals
Keep scrolling to see my short supply list for today’s card. Thank you for visiting, and shopping at my store!
Jul 14, 2019 | Gallery, Global Design Project, Hand-Crafted Cards |

Welcome to the Kre8tors July Blog Hop, where “floral” is the theme.
It’s hard to believe that next month, demonstrators will be seeing the new Stampin’ Up! 2019 Holiday Catalog, but we will! This made me think of my favorite “year-round” set from last year’s Holiday Catalog that carried over into the Annual Catalog. Let me re-introduce the First Frost Stamp Set and Frosted Bouquet Dies, which can be ordered right now!

Year-round Bouquet
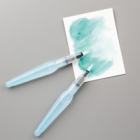
I began with a Thick Whisper White card base, and a rectangle of Thick Whisper White Cardstock that I watercolored with my Aqua Painter and Seaside Spray Ink. This was done by transferring the ink from the ink pad to an acrylic Clear Block, and picking up the color with the Aqua Painter brush. In addition to brushing across the paper, I flicked some spots for interest. Then, I trimmed it to size, creating a scalloped edge, with a Be Mine Stitched Die.

The three flowers were stamped in Terracotta Tile Ink on Whisper White cardstock, and cut with their die. Next, I stamped the middle branch in Pear Pizzazz Ink, and used it’s die for cutting. The leaves on the left were cut with a die from Pear Pizzazz Cardstock, and the two sprigs were cut with a die from Pear Pizzazz Cardstock and Whisper White Cardstock. I gave the cuttings and background texture with the Subtle Texture Embossing Folder.

The sentiment, “for you,” is from the Beautiful Bouquet Stamp Set, which I stamped in Pear Pizzazz Ink on Whisper White cardstock. It’s cute, little, die is in the Bouquet Bunch Die Set, with a real hole for the Linen Thread tie.
To complete the card, I decorated the envelope flap with the Eyelet Lace Embossing Folder, shown in the first picture.

The colors were inspired by Global Design Project. What a pretty combination!

My supplies are in the Product List below, and I always appreciate you shopping in my store. If you have ordered from me, I will be sending you the new Holiday Catalog in August, as soon as it’s available. Fun, fun, fun!
Thanks so much for visiting my blog, and supporting what I love to do.
Now, continue hopping to see the wonderful florals the Kre8tors are anxious to share with you. We love reading your comments. Please click to leave a COMMENT HERE.
Clicking the “next” button will take you to Melissa Tennison’s blog.

Melissa Tennison (USA)
Tricia Butts
Michelle Bryant
Rebecca-Jo Unwin- Australia
Linda Handford UK
Jacqui Lawrence
Libby Fens
Lisa Kmiec
Angie McKenzie (USA)
Annette Ball
Margriet Siekman
Sandra Roberts (UK)
Cheryl Taylor (UK)
Jan Musselman (USA)
Deb Naylor Flying Stamper
Annette Elias
Anastasia Radloff
Janey Backer (USA)
Laura Mackie UK
Su Mohr YOU ARE HERE
Product List
Jul 14, 2019 | Gallery, Hand-Crafted Cards |
If Dinosaurs Came to Town was one of my daughter’s favorite books. I recognized the Pteranodon (Ter-AN-oh-don) in the Dino Days stamp set, because of this book. See it in the upper, right corner?

Pteranodons
Of course, I had to get Stampin’ Up’s! new Dino Days Bundle! And, the pteranodons asked to be on this card, because they thought they’d look really nice in the Paper Player’s colors.

So, I agreed, and used their stamp from the Dino Days Stamp Set in Blueberry Bushel, Balmy Blue, and Granny Apple Green Ink on Thick Whisper White Cardstock. Then, I cut them with their Dino Days Die. Don’t they look happy?

The Pteranodon’s background is made of layers:
1. Blueberry Bushel card base 2. Whisper White Cardstock 3. Blueberry Bushel Cardstock (cut with Rectangles Stitched Die) 4. Whisper White Cardstock 5. Perennial Essence Designer Series Paper (cut with Rectangles Stitched Die).

The Pteranodons wanted to say, “from all of us,” so I found this sentiment in the Itty Bitty Greetings stamp set. It fit perfectly in a Stitched Nested Label Die. After adding Dimensionals, my Dino Days card was complete.

Thank you for sharing in sweet memories of my daughter’s childhood, and bedtime story time.
Keep scrolling to see my Product List. Clicking on the pictures takes you to my store, where you can order your own dinosaurs.
And, more inspiration from the design team using this beautiful color combination:
Product List