Mar 2, 2020 | Gallery, Hand-Crafted Cards |
If you start with beautiful Designer Paper, it’s easy to make a card you will love. This Bird Ballad DSP remains a favorite.

It’s Your Day!
I began by cutting a 4 1/2″ X 5 1/2″ section of DSP, careful to have three full birds, and one that I could place in a circle.
Next, I cut Whisper White Cardstock, the same size, and glued the two together. Then, I used the largest Stitched Rectangle Die for cutting, giving me even edges, and well placed birds.

Before gluing my DSP to the Thick Whisper White card base, I used a Layering Circles Die to cut the pink bird from the DSP. Then, I used a Layering Circles Die with a scalloped edge, to cut a backing for the pink bird, from Thick Whisper White Cardstock.
I also taped Crinkled Seam Binding Ribbon to the back, and tied a double bow on the front.

“It’s your day!” is from the Under My Umbrella Stamp Set, stamped in Mossy Meadow Ink, and cut with an Ornate Frames Die.

My inspiration was from CAS(E) this sketch.

Are you ready to place an order? If you use my March Host Code (JTDHJ36F) with a minimum order of $50.00, I will send you the Pearl Basic Jewels in April.

Let me know if you’d like to become a Demonstrator for the discount, and the ability to pre-order, without business required. It’s fun being a “hobby” Demonstrator!
Sale-A-Bration ends March 31, and it is the best time to join Stampin’ Up! Click here to join now.

I appreciate you stopping by. Have a wonderful day!

Product List
Mar 1, 2020 | Gallery, Hand-Crafted Cards |
Do you remember how it feels to swing? You can see the joy in this barefoot girl from the Silhouette Scenes Stamp Set.

swinging
I stamped the swinging girl in Night of Navy Ink on Whisper White Cardstock, and used a Layering Circles Die for cutting.

For the background I chose Perennial Essence Designer Paper with a “dreamy” look. Don’t you love those little, floating, daisies?
Before gluing the DSP to the Thick Whisper White card base, I cut a 2” section from the left side. Next, I backed this with cardstock for thickness, and used the Banner Triple Punch to cut the nice, even, ends. Then, I raised it on Foam Adhesive Strips for interest.

“Happy Birthday” is from the Special Someone Stamp Set, which was the right font and size for the Ornate Frames Die. I stamped it in Night of Navy Ink on Thick Whisper White Cardstock.
This photo also highlights the pearls, one of my favorite embellishments, and my Host Code gift for March.

Freshly Made Sketches was my inspiration.

Since pearls are a favorite of mine, they are my gift to you for the month of March. When you order a minimum of $50.00 in March, and use my Host Code #JTDHJ36F, I will send you 140 pearls in April. Yipee!
Thank you for stopping by. Let’s make March a wonderful month!
Product List
Feb 28, 2020 | Gallery, Hand-Crafted Cards |
The Bird of Paradise from Tropical Oasis Designer Paper takes center stage on today’s card.

Bird of Paradise
I first cut three sections of designer paper; the top and bottom from Tropical Oasis DSP, and the middle from Perennial Essence DSP. After gluing these sections to Pretty Peacock Cardstock (4 1/4″ X 5 1/2″), I used the largest Stitched Rectangle Die for cutting.
TIP: The papers you are cutting need to be larger than the die.
Next, I cut the Bird of Paradise paper with a smaller Stitched Rectangle Die, making the DSP shorter with the help of the larger die, to fit the shape I wanted. Then, I backed it for thickness, and added Dimensionals.

Before adhering the Bird of Paradise, I used a Tropical Die to cut three palm fronds in three colors of Cardstock: Mossy Meadow, Old Olive, and Granny Apple Green.

“Aloha” was cut with an In the Tropics Die from Noble Peacock Foil. Isn’t the shine pretty?

My layout is from the Paper Player’s sketch.

Thank you for stopping by, I appreciate you being a “follower!” Please enjoy shopping at my store by clicking on my “shop” button, or the pictures in my Product List below. It’s Sale-A-Bration time, so earn FREE products with qualifying orders of $50.00 or $100.00.
PLUS, if you use my February Host Code (U463KNM3) with a minimum order of $50.00, I will send you the Eyelet Lace Embossing Folder in March. There’s only two more days; don’t miss out!

Eyelet Lace
Product List
Feb 26, 2020 | Gallery, Hand-Crafted Cards |

I love seeing patterned umbrellas, and here are some beauties made with Peaceful Poppies Designer Paper. Even the rain is included in this paper pack!

I began with an Under My Umbrella stamp and Memento Black Ink, stamping the frame on four of the patterns from Peaceful Poppies DSP. Then, I used the Umbrella Builder Punch for cutting.
It’s called a “builder” punch, because it comes with the umbrella handle, which I used for cutting four handles from Thick Whisper White Cardstock. It also has a partially opened umbrella, which I’m not using today. What a great punch!

Next, I trimmed the “rain paper” to size, and used a Be Mine Stitched Die to give the top and bottom, stitched, scalloped edges.

“Rain or shine, you’re always on my mind” is from the Under My Umbrella Stamp Set, stamped in Memento Black Ink, and cut with a Stitched So Sweetly Die.

I appreciate you visiting today, and I hope you enjoyed see the beautifully patterned umbrellas. Thank you!
Please enjoy shopping at my store. This stamp set and punch can be purchased in a “Bundle” for a 10% discount. Or, they can be purchased separately, as you can see in my Product List below. Just click on the pictures for details, and to start filling your shopping bag.
Keep in mind, if you use my February Host Code (U463KNM3) with a minimum order of $50.00, I will send you the Eyelet Lace Embossing Folder in March. There’s only a few more days; don’t miss out!
Eyelet Lace
“Rain or shine you’re always on my mind”
P.S. My March Host Code is for pearls.
Product List
Feb 25, 2020 | Gallery, Global Design Project, Hand-Crafted Cards |
Just when you think you have enough flowers, you see this beautiful blossom from the Timeless Tropical Stamp Set!

Tropical Wreath
I stamped the three flowers in Crushed Curry Ink on Whisper White Cardstock, and used their die, from In The Tropics, for cutting. Then, I blended the lines together by using an Aqua Painter.
TIP: Since I didn’t use Watercolor Paper, my Aqua Painter was barely wet. I achieved this by holding the flower and brush upright.
The background was also made with the help of an Aqua Painter. I let the brush get wet this time, soaked it in Night Of Navy Ink, and tapped it onto the Whisper White Cardstock.
TIP: My Cardstock was placed in my laundry room sink, so I didn’t have to worry about stray splatters. And, I didn’t overdo it, because this isn’t Watercolor Paper.

Next, I cut the “wreath” from Garden Green Cardstock, using a Painted Labels Die. A Layering Circles Die was used to remove the middle.
After deciding the arrangement of my flowers, I stamped three leaves from the Timeless Tropical Stamp Set in Garden Green Ink. I used the same Aqua Painter, blending method, as with the flowers.

“Thank you” is from the same stamp set, which I stamped in Night of Navy Ink.
Finally, I placed the flowers on Dimensionals, and added tiny, Iridescent Sequins, to their centers.

My color combination is from the Global Design Project challenge.

Thank you for stopping by, I appreciate you being a “follower!” Please enjoy shopping at my store by clicking on my “shop” button, or the pictures in my Product List below. It’s Sale-A-Bration time, so earn FREE products with qualifying orders of $50.00 or $100.00.
PLUS, if you use my February Host Code (U463KNM3) with a minimum order of $50.00, I will send you the Eyelet Lace Embossing Folder in March. There’s only a few more days; don’t miss out!
Eyelet Lace
Product List
Feb 24, 2020 | Gallery, Hand-Crafted Cards, TGIF |
Today’s card made me feel like I was hanging a painting in an art gallery.
I am definitely a fan of Stampin’ Up’s Designer Paper. Each new catalog brings a wonderful selection of DSP with coordinating products.

Art Gallery
This thank you card is featuring the gorgeous, Lily Impressions Designer Paper, the front side, and the back side, of the DSP.
First, I cut two pieces from the back side; Bermuda Bay and Garden Green. Second, I glued the two pieces to Whisper White Cardstock (4″ X 5 1/4″), having them meet in the middle. Next, I used a Stitched Rectangles Die for cutting, which insured an even border, and then glued this to a Thick Whisper White card base.

My “painting” is a favorite design from a front side, which I cut with a Stitched Rectangle Die, framed with Whisper White Cardstock, and “hung” with Dimensionals.

“Thanks” was made with a Well Written Die and Thick Whisper White Cardstock.
So, there you have a clean and simple card, using very few supplies. You can see them in my Product List below. You’ll notice that the price of the Lily Impressions DSP is $0.00. That’s because it is one of the FREE Sale-A-Bration items! WooHoo!

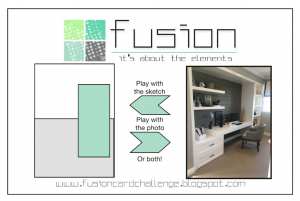
I’m entering my card in two challenges:

Thank you for stopping by, I appreciate you being a “follower!” Please enjoy shopping at my store by clicking on my “shop” button, or the pictures in my Product List below. It’s Sale-A-Bration time, so earn FREE products with qualifying orders of $50.00 or $100.00.
PLUS, if you use my February Host Code (U463KNM3) with a minimum order of $50.00, I will send you the Eyelet Lace Embossing Folder in March. There’s only a few more days; don’t miss out!
Eyelet Lace
Product List